

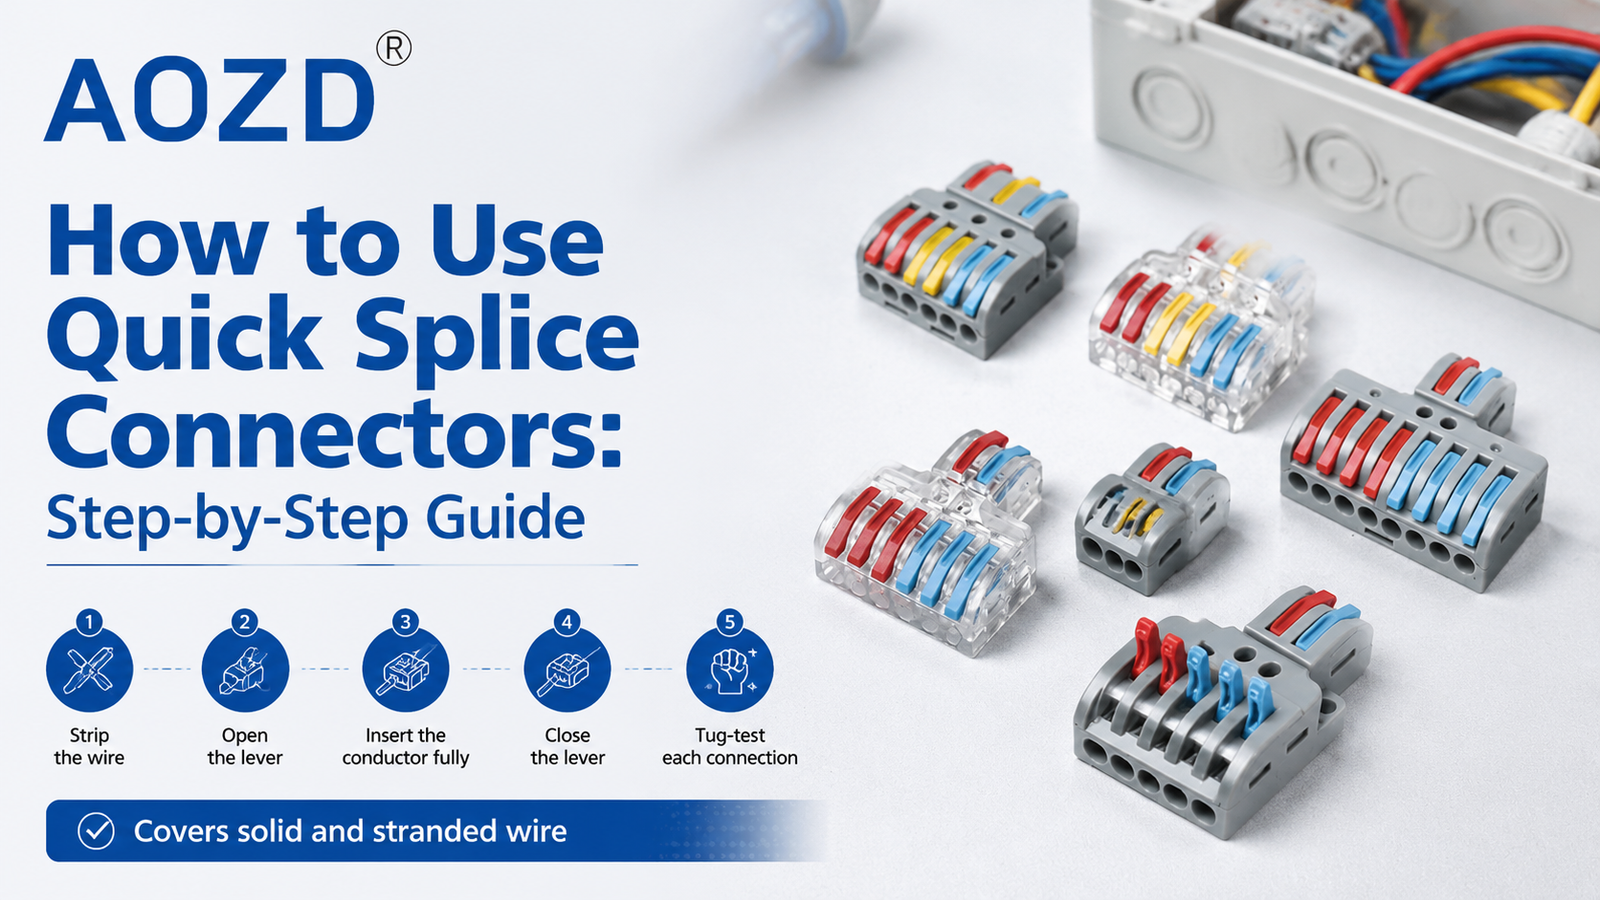
A quick splice connector—also called a lever wire connector or push-in splicing terminal—joins two or more wires without twisting, soldering, or screw terminals. You strip the wire ends, lift the lever, push each conductor into its port until it seats, and close the lever. Done correctly, the connection is tool-free, reusable, and carries its full rating. This guide walks through each step in order and covers the wire types and habits that keep a splice reliable.
What Is a Quick Splice Connector and When Should You Use It?
A quick splice connector holds each wire with a spring-loaded clamp inside its own port. Lifting the lever opens the clamp; inserting the stripped conductor seats it; closing the lever presses the clamp onto the copper. Because the contact releases when you lift the lever again, you can also remove and reposition a wire without damaging it. That combination makes the connector a good fit for junction wiring, LED lighting, household appliances, and other indoor electrical work where a connection may need to be re-done.
The lever style also suits people who want an inspectable joint rather than a twisted pair hidden inside a wire nut, and it removes the fiddly step of pre-twisting stranded wire.
Tools and Parts You Need
- Wire strippers sized to your wire gauge
- Quick splice connectors matched to the wire gauge, port count, and current and voltage rating you need
- Solid or stranded copper wire, stripped to the length the connector recommends
- A junction box or enclosure when the connection is not made inside a fixture
For a concrete example, the AOZD LT Series Quick Wire Connector is a lever-operated push-in splicing terminal rated up to 32 A and 450 V, with a flame-retardant PA66 housing and copper spring contacts. The LT2-8, LT3-12, LT4-8, LT-422, LT-623, LT-633, and LT-933 models accept both solid and stranded wires.
Step-by-Step: How to Use a Quick Splice Connector
Step 1: Turn Off the Power and Confirm It Is Off
De-energize the circuit at the breaker or disconnect before you handle any wire. Confirm the power is actually off with a non-contact voltage tester or a multimeter at the points you will touch. Do not rely on a wall switch alone; someone else could turn it back on.
Step 2: Strip the Wire Ends
Use a wire stripper matched to your gauge so the insulation is cut cleanly without nicking the copper. Most lever connectors take roughly 10 mm (about 3/8 in) of exposed conductor, close to the depth of the port. Re-cut the wire if strands are broken, and remove any loose fragments before inserting it.
Step 3: Open the Lever on Each Port
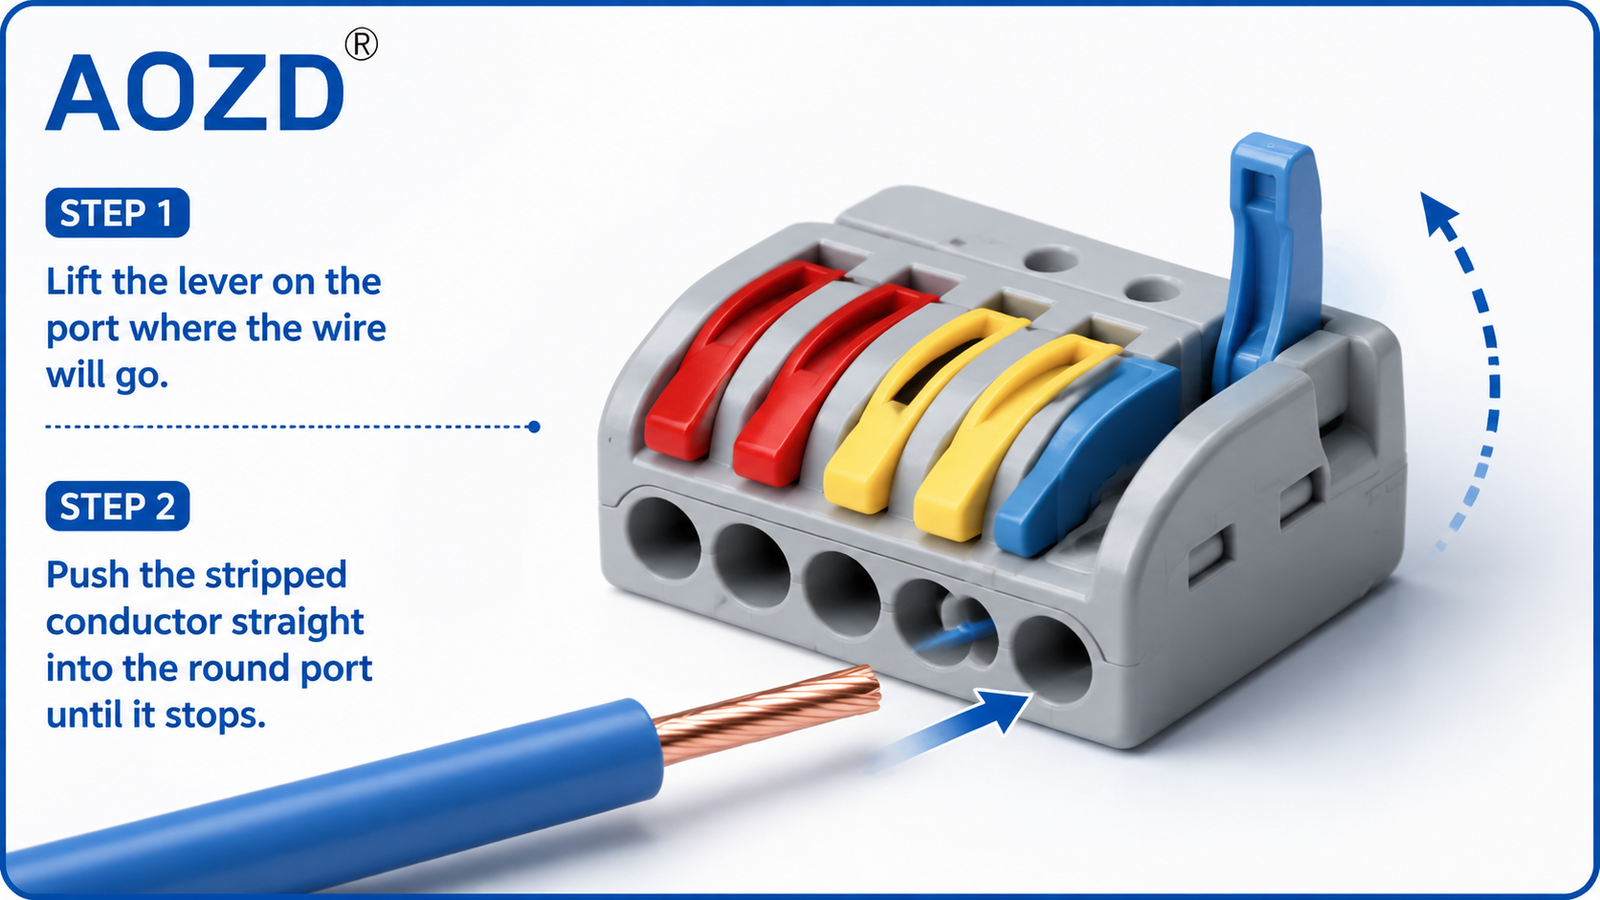
Lift the lever on the port where the wire will go. In a multi-port connector, each port has its own lever, so open only the ones you are using.
Step 4: Insert the Stripped Wire
Push the conductor straight into the round port until it stops. Insert the bare copper up to the insulation so no bare metal is left exposed, and give the wire a slight wiggle if the strands resist. Do not insert insulation into the port.
Step 5: Close the Lever
Press the lever down until it locks. A correctly seated wire is held firmly by the clamp; the connection is finished when every lever you opened is closed.
Step 6: Tug-Test Each Connection
Give each wire a firm pull after closing the levers. A properly inserted wire resists removal. If a wire pulls out, lift the lever, re-strip or reinsert it, and close the lever again.
Which Wires Work Best
Solid and stranded copper wires both work in a lever splice connector. Solid wire is the simplest to insert. Stranded wire works just as well because the clamp compresses the whole bundle rather than relying on you to twist it into a tight shape first.
- One conductor per port. Run parallel or doubled wires into separate ports or choose a connector with enough ports.
- Match the gauge to the port. Forcing an oversized wire can damage the clamp; a much smaller wire may not seat firmly.
- Tinned stranded wire fits many connectors, but a tinned end can deform under long-term pressure, so confirm it seats and always tug-test it.
- You normally do not need a ferrule in a lever connector designed for bare stranded wire.
How to Release and Reuse a Connector
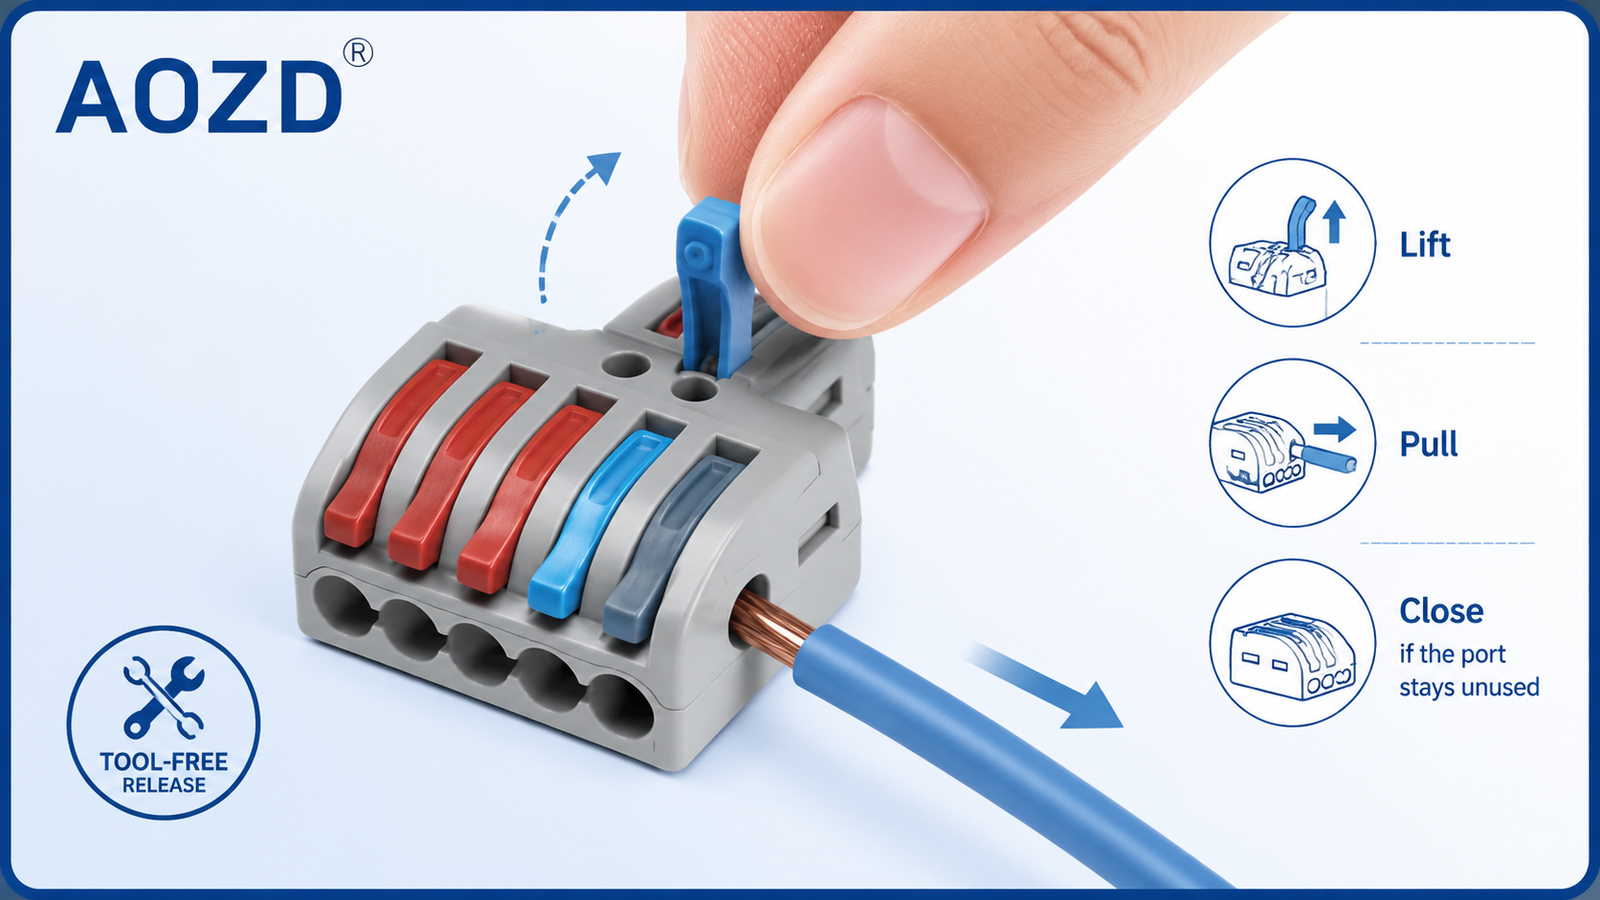
To remove a wire, lift the lever, pull the conductor straight out, and close the lever if the port stays unused. No tools are involved. This is the practical advantage over a wire nut in rework: you can release a wire, reposition it, and close the lever again without cutting or unwinding anything.
Safety and Ratings
A splice is only as safe as its rating and application. Match the connector’s current and voltage rating to the circuit: the AOZD LT series is rated up to 32 A and 450 V, so it suits LED lighting, household appliances, and junction wiring rather than high-current mains feeders. Use a connector with a flame-retardant housing, such as the LT series PA66 body, and keep the connection inside a proper enclosure or junction box for indoor wiring. Never exceed the wire gauge range of a port, and finish every splice with a tug test.
Quick Splice Connectors vs. Wire Nuts
| Consideration | Quick splice (lever) connector | Wire nut |
|---|---|---|
| Tools needed | Wire strippers only | Wire strippers; optional pliers for a tight twist |
| Reuse | Lift lever, pull wire out, close again | Unscrew and re-twist; strands can unwind |
| Inspection | Contact visible through the housing | Hidden inside the nut; must be removed to check |
| Stranded wire | Clamp compresses the bundle, no pre-twist | Strands usually need shaping before twisting |
| Best for | Rework, lighting, junction boxes, DIY | Traditional twist-on splices |
Frequently Asked Questions
How many wires fit in one quick splice connector?
One conductor per port. Pick a connector with as many ports as your splice needs, such as a 2-, 3-, or 4-port model.
Can I use stranded wire?
Yes. Lever connectors clamp the whole conductor bundle, so stranded wire seats firmly without being twisted first, as long as the gauge is within the port range.
Are quick splice connectors reusable?
Yes. Lift the lever to release the wire, then close the lever again. Repeated install and release is the main reason rework becomes faster with these connectors.
What tools do I need to make a connection?
Wire strippers are enough. The connection itself is tool-free: strip, insert, and close the lever.
Conclusion
Using a quick splice connector comes down to three moves: strip the wire, insert it into an open port, and close the lever. Keep the strip length close to the port depth, one conductor per port, and finish every splice with a tug test. Choose a model whose current, voltage, and wire-gauge range match the circuit, and use it in the indoor, enclosed applications it is rated for.
If you are sourcing a quick splice connector, browse the AOZD quick wire connector range, check the LT series specification for a lever-operated option, or contact the AOZD team with your wire gauge, port count, and current requirements for a recommendation.